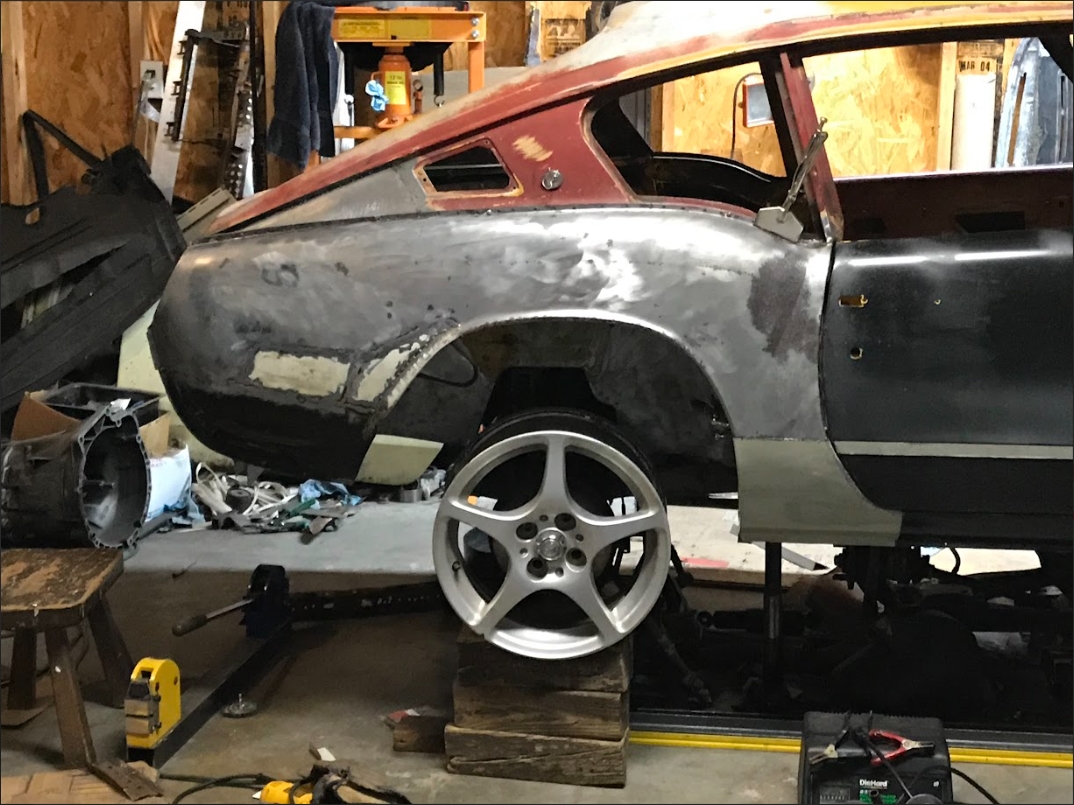
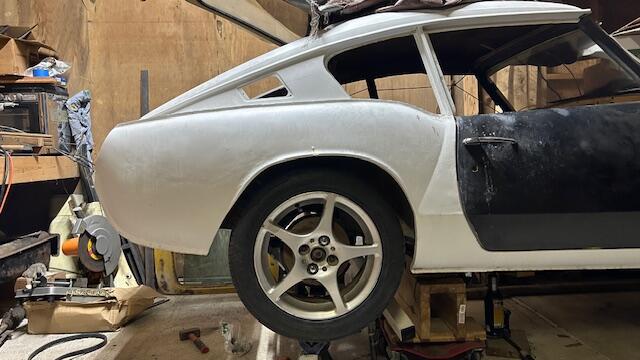
As previously mentioned, the car project has been put on the sidelines again. However it feels great to have the suspension in place even though I have to let it sit for awhile again. The reason for this post is my birthday has came and went and I received new wheel centers with a Triumph logo to go into my MR2 wheels. Makes it look a bit more finished.
VR6 made RWD put into a Triumph GT6
3.6 VR6 in a GT6 and made RWD. Components used in the car: 2006 Passat VR6 (3.6L) 1970 Triumph GT6 BMW Getrag 5 speed BMW E36 188mm (medium case) Diff Miata NA series Rear suspension
Saturday, June 21, 2025
Wheel centers
As previously mentioned, the car project has been put on the sidelines again. However it feels great to have the suspension in place even though I have to let it sit for awhile again. The reason for this post is my birthday has came and went and I received new wheel centers with a Triumph logo to go into my MR2 wheels. Makes it look a bit more finished.
Monday, May 26, 2025
Miata rear suspension installed
The last while has been spent building the bridge from the Miata subframe to the Triumph frame. Capped off the widened and moved inboard, Triumph frame rails. Then added gussets to the top and capped that off as well. Then started welding in the finished floor.
Then took the time to do the fun part. Bolt in the control arms and wheels. Checking for clearance it looks quite good. may need to clearance the flange at the rear part of the wheel a bit. I had left them long when redoing the fender so no problems taking a bit off. It will depend on where the actual max upper position is. Still have to check on that.
From inside looks about the same as factory :-)
But underneath it's a whole different structure. Have the front floor pretty much welded in.
Don't have the shocks and springs in at the moment so I can move the wheel up and down. The upper and lower mount for it are same as when it was in the Miata so it's simply bolting them in. Also will probably fit it with a roll bar. Will try to narrow the Miata one. Will see how that goes.
Sunday, May 18, 2025
Differential In The Car
Sunday, May 11, 2025
Subframe About Done
Has been a month since my last update. Been working to finish up the subframe and some of the body structure. Both are about done. The subframe needs the front mount designed and fabricated to hold the differential and a few tweaks.
More work needs done on the body side so it's not ready for show and tell yet. For now here's a few subframe pictures.
Wednesday, April 16, 2025
Beading Floors And Misc
This past week time was spent trying out a newly purchased beading tool. Being able to bead looked like fun and with so much of the rear floor needing reworked it seemed like a good time.
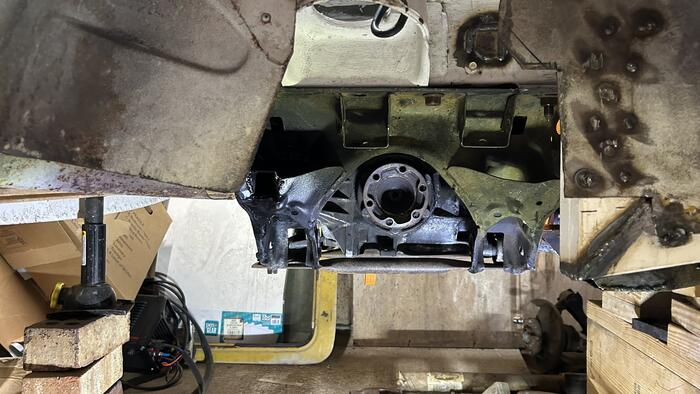
Also done this week was the Miata narrowed subframe needed opened up a bit where the differential pokes out. As the differential tapered back it was hitting on the subframe. With the frame narrower it shouldn't need so much structure there anyway. Cut it back a bit and welded it in. In that pic you can see some of the new floor that's been beaded.
Also tossed in a side view of the car with the subframe temporarily bolted in. Lots more structure to rework but getting farther.
Thursday, April 10, 2025
Rear Wheel Well Rust
One of the video blogs I watch said "the project you have to do before you get to the project you want to do". This is one of those. To finish up on my Miata suspension project I needed to fix the rust in the wheel wells. Had been putting that on the back burner when doing rust repair but now it had to be done.
Cut out the inner wheel well where there was rust between it and the doubler on the outside. There was zero primer or rust protection on the metal between the two. Luckily most of the outer doubler was in good shape but did have to cut off a bit and weld on a new section. Wire wheel and some paint on the doubler. Then weld on some new patches made from some sheet metal from a GT6 parts car. Keeping it Triumph original :-)
Some keen observers will notice the opening has been cut out larger to accommodate the Miata control arms. At this point I already had the suspension bits fitted for location but removed to fix this rust before I start welding it all together. Using the huge hole in the floor for access repairing the rust did make things a bit more comfortable.
Sunday, April 6, 2025
Downsides Of Leaving A Project Sitting
As I return to my project car hobby, at least for awhile, I become faced with some of the issues of leaving it sitting. Rust and corrosion on things that in my mind were still brand new but now more than 2 years old.
Opening the hood there is a bunch of corrosion and sand. It was bad weather when I moved it to the new house and the road spray carried sand into the engine bay. humm. Hadn't thought of that happening or I would have tarped the front better. Another glaring issue was the fan shroud. Didn't have a chance to paint it before the move and with the road spray and perhaps even salt, it was looking pretty poor. Luckily it cleaned up good with the wire wheel and was treated to a crude brush epoxy paint to keep that from happening again. At the moment protection is more important then pretty.Thursday, March 13, 2025
Old Suspension Out.
Cleaned out the back of the car, put it back up on it's stands and got to work with the angle grinder and plasma torch.
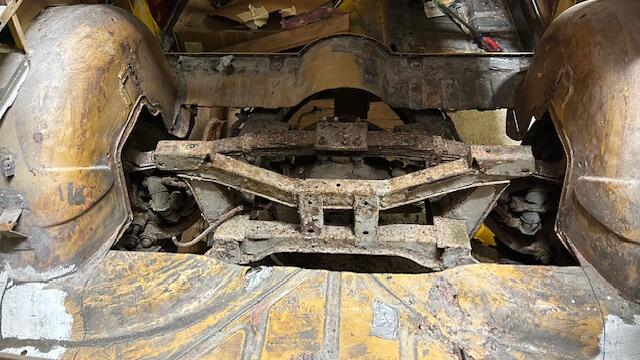
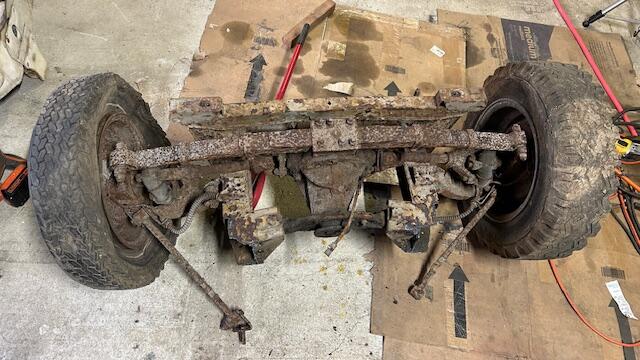
Cut a hole large enough in the floor to put in the Miata narrowed subframe. Then cut out the old suspension!
Out with the old
in with the new.....Test fitted the new suspension with the wheel on. Looks like I got the width right where I was wanting it. Now to weld it all in.
Monday, December 16, 2024
Rear Suspension Work
Wow, another year slips by without a post. Not a lot going on with the car project but I have fiddled with it from time to time.
Over the past year I've purchased a differential and started trying to fit it into my narrowed Miata rear subframe. After cutting out some large chunks (new plasma cutter!) it became pretty apparent that this wasn't the best differential choice as far as mounting style. But it is what I have and I'm not turning back now! I took a few days this past week and have managed to fabricate and weld in the rear diff mount. Need to fab up the front diff mount and then it'll be time to try and fit it into the car.
To do that I'll have to empty the car first. Oh, it's still full from the move. Well add that to the "to-do" list.
Also purchased in the last while was seat tracks. The plan is to put in non Triumph seats but using the Triumph seat tracks should make it easier.
It is funny leaving the project and coming back to it. The first impression I had was WOW those doors shut great. Give it a little push and it clicks home so easy. I know it wasn't like that when I bought it. I was also impressed by how solid the repaired areas are. Yes there are areas that need a little body filler due to ripples or whatever but it's solid. So cool.
Sunday, September 17, 2023
I'm Still Here - Just Busy
It has been about a year since my last post. Sadly it's probably been that long since I've done much to the car but not from lack of wanting to. This being a hobby it gets pushed to the back of the line of many things on my to do list. And since my last post we moved. Selling a house, buying another and moving are very time consuming. But the housing market being what it was and choices being limited we ended up buying a fixer upper. This has taken most of my free time and little time for hobbies. But things are getting more under control now and I even bought a part for the car project (a driveshaft). Perhaps I'll actually get to working on it again.
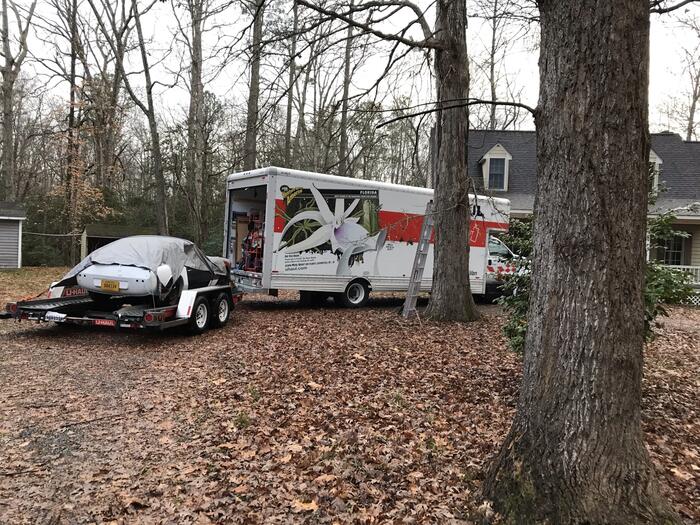
Here are some pictures of the car on the car transporter. The car's cabin is filled with most of the parts needed to finish the car. Under hood is the engine and radiator. There may be a few more things added but not a lot. Judging from the tire gap it appears the new engine and configuration has the front end lighter. Hard to say until everything is assembled but it's looking that way.
Sunday, October 16, 2022
Ran The Engine - Differential Woes
Wow haven't updated this in a bit. Since I wrote last I sorted out the computer issues that were keeping the car from trying to start. Bought a new battery and was ready for another test run. Oddly there was an issue with the fuel pump piping. There are 2 fuel lines coming out of the pump, one is for a siphoning pump or something. Previously I had just left it to recirculate back into the tank but it appears it needs some back pressure or nearly all the pressure goes out that line. Odd it hadn't done it before. For now I plugged it. With that solved the engine ran good and let it run for 5 min before deciding to shut it off.
Next on the to-do list is sort out a differential. Wanted to go with a BMW E36 LSD with a 2.93 ratio. I've purchased a 2.67 set of gears that I could swap in as I don't think I'll need much help getting off the line with about 3x the power and low RPM on the freeway would be great. Pretty set on the LSD as with the extra power really need the help getting it to the ground.
Previously I had stopped by a junk yard, a couple hours away, to get one that was listed as LSD but when I went to pick it up it wasn't LSD so no go (visually looked inside after by spinning it didn't feel like it had LSD). Tried another yard on vacation that listed one but they said I should give them a week to pull it. Perhaps next time I'm by this way. Since we haven't been by we call them and see if they will ship it. After several calls to them and getting they are checking on it with no return calls we give up (they never have called back). So we order one from a junk yard far away that has it listed as LSD and the right ratio etc. Told them if it isn't LSD don't ship it. They say they checked it and it's LSD and ship it to me. When I get it the diff has a totally different case and mounting as it's from the wrong year of car and the year range of car it's from NEVER came with LSD at all. I have a diff just like only feet away from where I open the box. I'm beginning to think that the yards don't know how to tell an Open diff from LSD. The yard isn't willing to admit their mistake and I end up having to cover shipping back to them at the tune of $83. Being charged for their incompetence doesn't sit well.
Think it's time to abandon looking for the unicorn differential. Buying and aftermarket LSD spool to add LSD is crazy expensive. Do I use the open diff I have or hold out for some other LSD. Looking for alternatives there are few modern vehicles with LSD. And few cars seem to have the ratio's i'm looking for open or not LSD. And to top it off the only versions that do have LSD seem to be from performance V8 cars so the diff is BIG. Would be over-sized for what I need and smashing a huge diff in this little car seems unnecessary but might be the way to go.
Friday, September 30, 2022
Running the motor again
It won't Start! But before I get to that an update on progress. Cooling hoses are connected up enough for testing. Here is a pic I took when it was mostly done.
After the cooling lines were all connected I powered up the electrical system and put the key in and it won't engage the starter. Bad deal. The cluster now says the steering lock is defective and red steering wheel lights up on the dash. That s a new and bad error. We have stripped a ton of wires from the harness but I've checked and all the ones for the steering lock are intact and look good. Using VCDS it surprisingly shows the immobilizer is happy. The steering steering lock is in the unlocked position. The steering lock quit locking on earlier engine starts due to some of the modules I removed.
I'm a bit frustrated with it. Not sure if the steering lock module is now broken, something else is broken, some wire to something else is missing causing it to think it's broken or if the no start is something unrelated. It may be time to remove the IMMO but if the issue is something else that's be kind of a waste and might not fix it. Already spent many hours looking over wiring diagrams and checking things. Fixed a couple wires that were mistakenly removed but so far still no starter action.
I've taken the steering lock apart and checked it to see if it just failed but it appears good. I expect it is likely a wiring problem from us removing gobs of wires or man handling the wires but where? My guess at the moment is either the J393 module or J519 module. Checked over the J393 module connections last night and none of the removed wires appear significant. Did find out that unplugging the J393 module allowed things to power up (T15) and NO steering defective error on the dash (no errors in the text window and and just a few lights). Strange. Oh with J393 plugged in and the steering lock unplugged or the steering wheel module unplugged nothing powers up. Or if the Steering lock is in the locked position (and everything plugged in) nothing powers up (it currently set to the unlocked position.)
Things I changed before the steering lock error went off. I found a ground wire not grounded. However this wire was simply a diode to ground from one of the power leads in the fuse box. Grounding the wire didn't appear to change anything. Recoded the comfort module (J393) back to Auto trans along with the steering wheel electronics back to Auto trans. Then the steering lock error (red steering wheel) went off and the steering lock started actuating again. The engine allowed to start field in VCDS is now showing as Yes.
The cluster still says "depress clutch", odd as I can't find anything that is not coded to auto trans with the exception of the gateway, which I've unchecked the auto trans as that module isn't there. On J519 there is a wire that ran to the P/N switch and looks like may go to the clutch switch on manual trans cars. When grounding that wire (T16g/7) the J519 module sees the P/N switch as activated. With that wire grounded pressing the key all the way in now activates the starter relay. Now I just need a better battery and some fuel and it should run again!
Got a new battery and the car started then died. No new errors. Seemed a bit fuel starved. Ran the pump a bunch of times hoping to get the air out but the engine would fire up, fun a bit and die. The fuel lines were connected the exact same way as the first time. So seemed like it should work. Looking at the fuel pump assembly I noticed a large amount of fuel coming out the extra line, I thought it was just for the 4motion version. The tube I had that would attach there inside the 4motion tank was quite restrictive so I just plugged it (see picture) and the car started and ran just fine. Ran the engine for about 5 min. and shut it down. So success there. The wiring and modules seem happy again.
After looking up new fuel pumps seems the FWD (2wd) version also has this same tube out of the fuel pump? Weird. Will have to research that a bit more.Below is a picture of the bin holding the wiring and a few electronics boxes we have extracted so far from the wire harness. And that's not even all of it.
Sunday, September 25, 2022
Possible Rear Disk Brake Conversion :-)
This week we finished up the temporary hose routing then tried to start the engine. Sadly it was complaining of some error and wouldn't even engage the starter. Strange as we had this setup working before and only removed wires that weren't connected to anything. After much time reading diagrams and checking thing and changing some coding back to automatic transmission we were able to get the error to go away. Unfortunately the battery is dying so I need to replace that before going farther.
Also on Saturday we brought in the floor from one of the scrapped GT6's. I kept it for the purpose of testing new suspension fitting. It's very liberating to be able to cut without worry that it's not the "right" place. And after I cut and fit it, sure enough, I could see a better spot to cut. So nice to have a practice run.
Overall it's not looking bad. Looks like I need to enlarge the suspension/axle tunnel 3-4" forward. I'll try to move the rear suspension cross brace forward a couple inches to avoid cutting the rear of the suspension tunnel on the actual car. Would like to get my differential to see how it fits in first (Waiting on the salvage yard). Then there is the integrating this part into the Triumph frame. Always more to do.
Sunday, September 18, 2022
Radiator Hoses - Possible New Rear Suspension?

This week was spent fitting radiator hoses. Bought a bunch of 90 degree elbows, misc hoses and an aluminum tube. Starting to fit it all to the motor. Used the simple wire crimper method to bead the end of the tube. No pictures but there's plenty on the web. Right now I'm skipping connecting up the heater and some of that misc. I can do that later. Waiting on some caps to cap off the unused ports.
Sunday, September 11, 2022
Mounting The Radiator
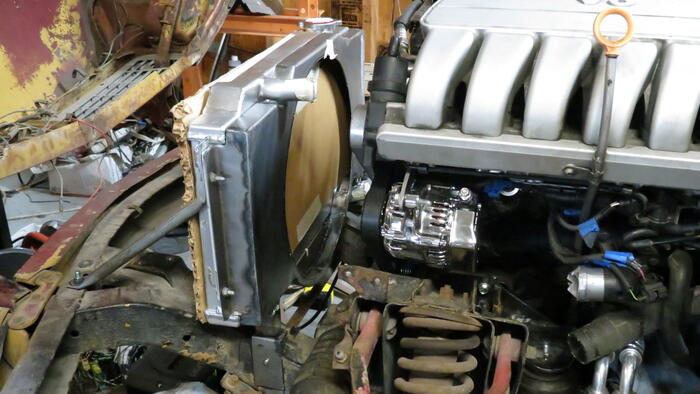
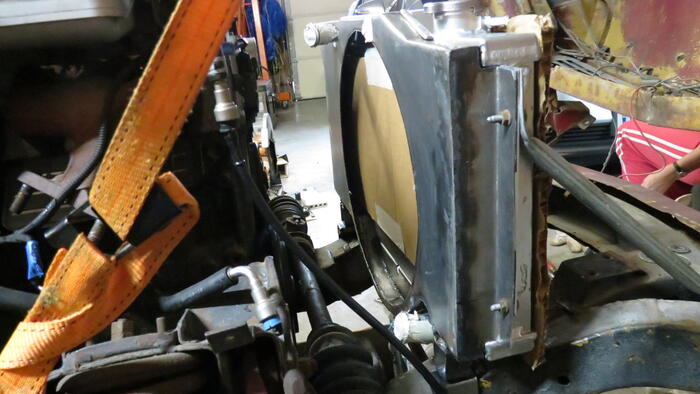
Now that we have a fan shroud and radiator it's time to put them in the car. The GT6 and spitfire use different mounting points on the frame.
Since my frame is a GT6 the spitfire mounts aren't there. Also the spitfire puts the radiator into a bracket then mounts it to the frame. Which I also don't have. So decided to make my own mounts.
Monday, September 5, 2022
Fan Shroud
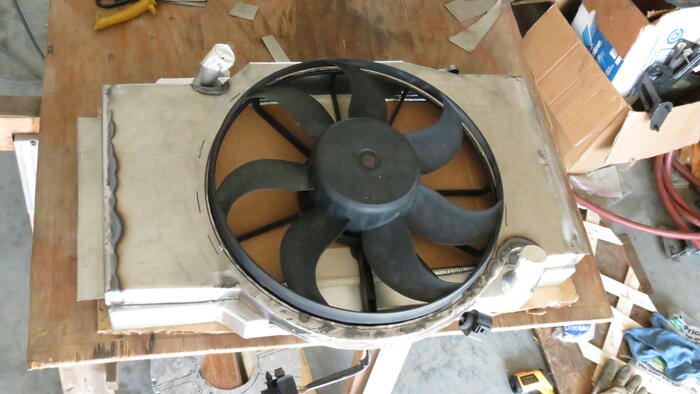
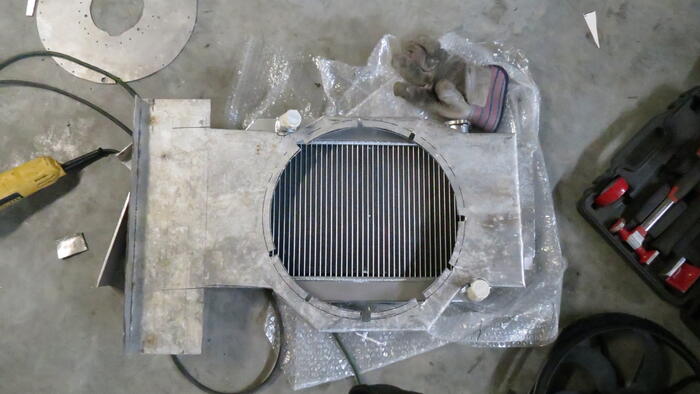
Last 2 weekends I worked on creating a fan shroud. Plan is to use the Passat OEM fan so it'll play nice with the ECU. Wanted to use the Passat radiator too but it was too large to fit under the hood. Looked at using the GT6 radiator but with the engine so far back the Gap between the radiator and the engine looked ridiculous. Decided to buy a cheap Spitfire radiator as it sits farther back. Yah it's from a 4 cyl but the radiator area looked about the same. The GT6 is more vertical where the Spitfire is more horizontal. If it's a problem we'll probably go with a custom radiator However most hotrods, including my last engine swap, seem to have problems cooling in traffic not doing high HP runs.. which tends to be due to not enough air flow over the radiator and not the radiator size. So this car will be getting a fan shroud which should greatly improve the low speed cooling. Anyway back to the fabrication.
Fan shroud version 1 I created out of some aluminum sheet laying around. Thought it'd make a nice shroud to go with the aluminum radiator. And not having to paint it was a plus. It was going ok but it was starting to crack from some of the bending and joining the bent over flanges was looking like a drag. The metal was probably a bit too thick for what I was doing with it.
Fan shroud version 2 I made out of some 18 ga metal I had left. Working with the sheet steel was fun. It was easier to bend and I could easily weld bits together. Anyway it is pretty much complete except for paint.
Wheel centers
As previously mentioned, the car project has been put on the sidelines again. However it feels great to have the suspension in place even th...

-
Last 2 weekends I worked on creating a fan shroud. Plan is to use the Passat OEM fan so it'll play nice with the ECU. Wanted to use the...
-
The last while has been spent building the bridge from the Miata subframe to the Triumph frame. Capped off the widened and moved inboard, T...
-
One night I decided to modify some suspension parts I bought for the project quite a long time ago. Was kind of a whim thing to work on this...

