3.6 VR6 in a GT6 and made RWD.
Components used in the car:
2006 Passat VR6 (3.6L)
1970 Triumph GT6
BMW Getrag 5 speed
BMW E36 188mm (medium case) Diff
Miata NA series Rear suspension
This past week time was spent trying out a newly purchased beading tool. Being able to bead looked like fun and with so much of the rear floor needing reworked it seemed like a good time.
Also done this week was the Miata narrowed subframe needed opened up a bit where the differential pokes out. As the differential tapered back it was hitting on the subframe. With the frame narrower it shouldn't need so much structure there anyway. Cut it back a bit and welded it in. In that pic you can see some of the new floor that's been beaded.
Also tossed in a side view of the car with the subframe temporarily bolted in. Lots more structure to rework but getting farther.
One of the video blogs I watch said "the project you have to do before you get to the project you want to do". This is one of those. To finish up on my Miata suspension project I needed to fix the rust in the wheel wells. Had been putting that on the back burner when doing rust repair but now it had to be done.
Cut out the inner wheel well where there was rust between it and the doubler on the outside. There was zero primer or rust protection on the metal between the two. Luckily most of the outer doubler was in good shape but did have to cut off a bit and weld on a new section. Wire wheel and some paint on the doubler. Then weld on some new patches made from some sheet metal from a GT6 parts car. Keeping it Triumph original :-)
Some keen observers will notice the opening has been cut out larger to accommodate the Miata control arms. At this point I already had the suspension bits fitted for location but removed to fix this rust before I start welding it all together. Using the huge hole in the floor for access repairing the rust did make things a bit more comfortable.
This week we finished up the temporary hose routing then tried to start the engine. Sadly it was complaining of some error and wouldn't even engage the starter. Strange as we had this setup working before and only removed wires that weren't connected to anything. After much time reading diagrams and checking thing and changing some coding back to automatic transmission we were able to get the error to go away. Unfortunately the battery is dying so I need to replace that before going farther.
Also on Saturday we brought in the floor from one of the scrapped GT6's. I kept it for the purpose of testing new suspension fitting. It's very liberating to be able to cut without worry that it's not the "right" place. And after I cut and fit it, sure enough, I could see a better spot to cut. So nice to have a practice run.
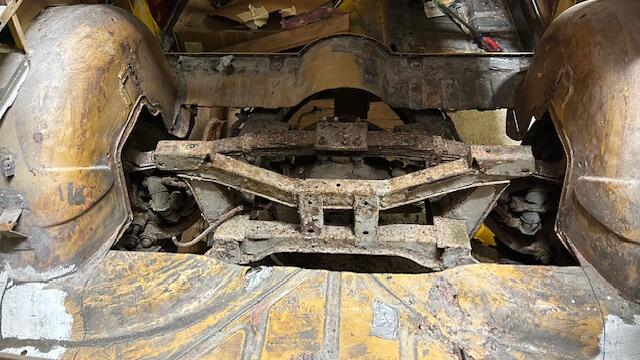
Overall it's not looking bad. Looks like I need to enlarge the suspension/axle tunnel 3-4" forward. I'll try to move the rear suspension cross brace forward a couple inches to avoid cutting the rear of the suspension tunnel on the actual car. Would like to get my differential to see how it fits in first (Waiting on the salvage yard). Then there is the integrating this part into the Triumph frame. Always more to do.
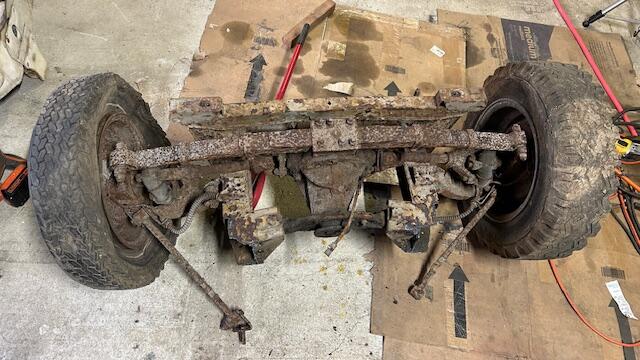
One night I decided to modify some suspension parts I bought for the project quite a long time ago. Was kind of a whim thing to work on this now and especially with so little planning but it looks like it might have turned out. Narrowed it 8 7/8 inches. Time will tell if this is a good amount or not. It's just tacked together so it is easy enough to change.
This week was spent fitting radiator hoses. Bought a bunch of 90 degree elbows, misc hoses and an aluminum tube. Starting to fit it all to the motor. Used the simple wire crimper method to bead the end of the tube. No pictures but there's plenty on the web. Right now I'm skipping connecting up the heater and some of that misc. I can do that later. Waiting on some caps to cap off the unused ports.
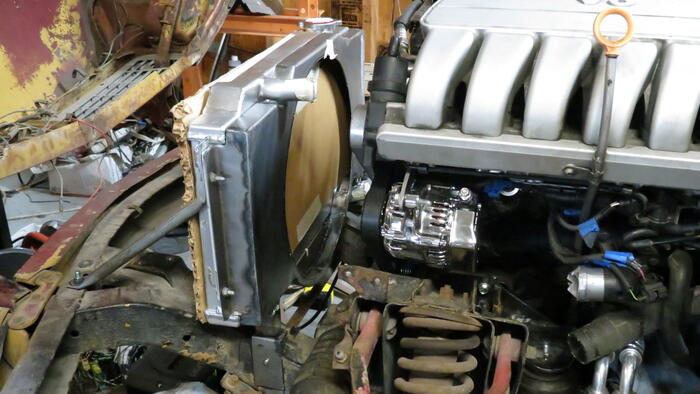
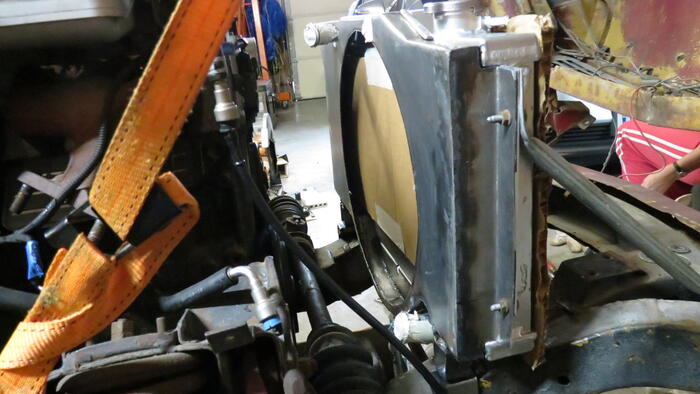
Now that we have a fan shroud and radiator it's time to put them in the car. The GT6 and spitfire use different mounting points on the frame.
Since my frame is a GT6 the spitfire mounts aren't there. Also the spitfire puts the radiator into a bracket then mounts it to the frame. Which I also don't have. So decided to make my own mounts.
Wasn't much of a chore to make them. Now the radiator is mounted and I can move on to fitting cooling hoses to the engine.
This week we put together the oil system. A custom adapter plate to the engine to some AN lines to a remote oil filter. It ended up in the wheel well as it's tight inside the engine compartment. I think that it won't get in the way of the front wheel. If it does it can be moved.
Also found that the oil dipstick wasn't in an ideal location now. Changing how the coolant pipes run made it in a less desirable location. So bent that up and welded on a new holding bracket. Also cobbled up some temporary set up for the fuel pump and piping to the engine.
Then it was a new set of spark plugs and connect up all the electrical fittings. Friday night it was all together but it wouldn't start. Was giving a bunch of errors codes for stuff on the motor. Time to call it a night.
Saturday morning we went out and pulled a spark plug. The plug was wet, so we were getting gas. Checked and no spark. Humm. More looking and there was no power getting to the coils at all. No power to the coils and the other errors were probably all from the same issue. After looking at some wiring information It had to be the power source to the coils (and other stuff ) wasn't working but how was the power run to the coils. Long story short the connector that brought in coil power and a few other wires that didn't go to or through the ECU had the wrong thing plugged into it. Simple fix and voilà it started the next try.
Here is a very short video of it starting and running:
Turned the car around in the garage. This car is so small I was able to fit it between the other two cars while turning it. No need to back any of them out. Now that it has the LH side out I can work on adapting the coolant system and oil system. Also found that the factory alternator from the donor car won't fit. So will do some adapting there. Decided it would be best to install the steering column to ensure there is adequate space around that. Took the column from one of the worst parts car so I don't have to worry so much about damaging it. On the plus side the steering fits no problem.
Little late on posting this week as what seemed like should take a few hours took much more. Had a bit of difficulty getting the holes where I wanted them which required re-work. oh well. Got it in now.
Looking at the finished product it doesn't look like much. But the mounts are not just fastened to the thin wall of the frame (about 14 gauge). I drilled a 1 1/4 hole all the way through top and bottom then welded in some pipe, welded in a 3/16 plug in the end of the pipe and drilled that for the motor mount. Then covered all of that with a 1/8 plate (tack welded at the moment). Should give it some strength.
The other tricky bit is that inside of the frame there is some supporting structure for the "A" arms I had to miss. But wanted to be as close to it as possible. Took some massaging of the holes after they were drilled to get it all to work out.
Getting the motor and trans to sit inside the engine bay is one thing. Getting them to sit level and not banging on anything is another. This week was spent doing more fine tuning on the location and checking how other things might fit (starter, alternator etc.).
After some time noticing how tight everything is between the suspension towers I went and checked out another swap project. Whoa. There was lots more cutting that I had thought. Made the cutting I had done so far look insignificant. Encouraged by the work of others I started cutting a bit more while still being conservative. Some more trimming and adjusting is required but it's pretty close to where it'll stay. It even fits with the starter on and there looks to be enough room for the exhaust to pass between the block and the frame.
Now that I have the location I have to come up with motor mounts for it. This is a bit of a challenge as I need to leave room for the exhaust and steering. I'd also like to use some mounts that do a good job of cutting NVH (usually requires large mounts). And I have to change up the oil filter/oil cooler combo bit as it won't fit at all. And need to know what to leave room for. So lots of time planning and not so much fabricating over the last couple days.
It's nice to have it at a good location. Now to get it to stay there :-)
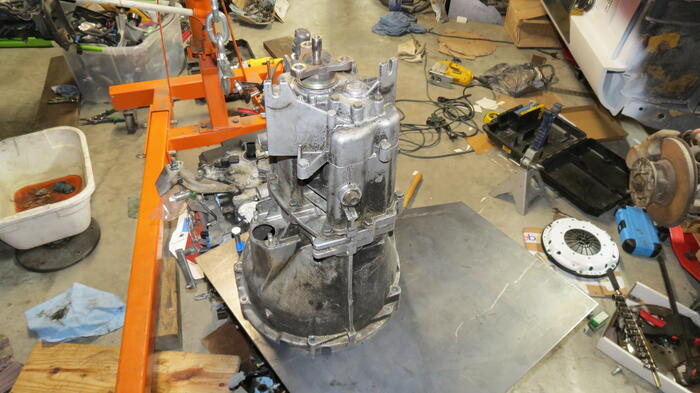
One problem with the motor I choose was it was in only FWD or AWD cars only. No RWD trans exists. This requires an adapter. I've made a trans adapter before on my EV project. Really didn't want to do that for this project but this is how it turned out.
After what seemed like forever planning and scratching my head for what the best scenario was I ordered a metal plate. It came in friday and work to mate the plate to the motor was started. I've successfully cut the center clearance and the dowel and bolt mounting holes.
Next up mounting the transmission to the plate. This motor has the timing chain on the backside and the timing cover bumps out into the transmission bell housing area. I'm not the first to use this combination and I cut my trans to clear in a similar way. A little more fitting and I can put in the dowel and bolt holes then cut the perimeter out.
Realized the 2nd year anniversary of my Triumph ownership was this past week. Seems like it would be good to have some a big progress to celebrate. How about some news on the re-engine portion of the project? The motor is a 3.6L VR6 24 Valve, direct injection, variable valve timing, variable intake, all the goodies. In stock form was rated at 280 hp. Best I can tell the motor weights similar to the GT6 motor, maybe less. It's mounted further back and the Battery will be relocated to the rear. Overall balance should be better than the factory GT6. Time will tell.
About a year ago I bought the donor car, a 2006 VW Passat, for the engine. Was very anxious to get started on that but forced myself to stick to the body work (which took way too long) to get the back of the car in solid shape before moving on. Then the winter came and progress halted for the winter.
The winter break was a little longer than anticipated as somehow we got the idea we wanted to try sailing in Florida for a vacation trip (since flying has gotten so complicated). Which ended up with us buying a fixer up boat and me doing a lot of projects in the driveway in the cold instead. (How was this better than working in the garage in the cold?). Anyway the boat was finished (well finished enough) and the sailing trip was a complete success. Six great days of sailing and covered about 100 miles.
Back to the GT6
The first weekend back I made some wooden supports to put the GT6 back on it's skates so it could be moved to the side to make room. Then the donor car was towed into the garage and deconstruction started. This past week I pulled the motor and started fitting it into the GT6. I wasn't sure the engine was going to fit so was quite interested in doing a test fit. Still a lot of fiddling and fitting to do but it looks like it can be made to work (with enough cutting and welding about anything fits. Right?). The engine may even keep it's factory intake.
The hood still doesn't quite close yet but I was out of time to work on it. I think the the hood bracing in sitting on the intake. Will have to do some checking on where it's hitting
Starting to think about priming the rear structure of the car. There are a bunch of little fixes and details that have been working on. Here are some of them:
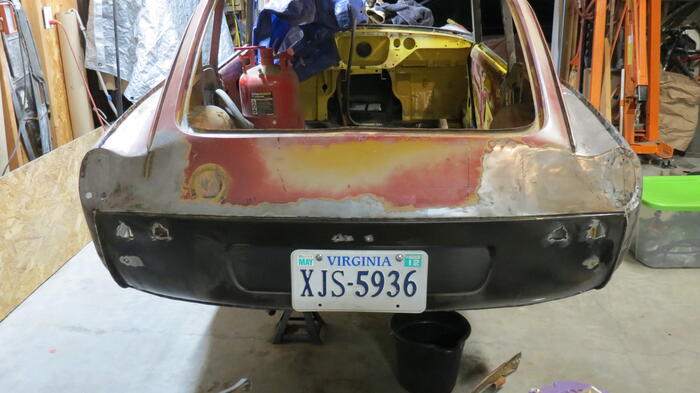
Drilled the holes in the rear valence. Was a bit scared to drill the light holes but looks like they turned out nice. Also put in the holes for the bumper support, license plate light and license plate. Welded in nuts on the inside for the license plate to make it easier to put on and hopefully more likely to keep out water.
Welded in the hatch latch support or whatever it's called. Had that floating around for awhile and am glad to have it attached.
Repaired the lower left corner of the hatch weather seal. This had rusted away as is pretty typical. Looked like some metal munching mouse had taken a little bite out of it. But now it looks all good again.
Seam welded the fender to the lower valence pinch weld closed. This originally had a painted decorative cover over it. I'm considering not adding the cover as it looks like a water trap to me. The welded seem ground smooth looks pretty similar. Will see what it looks like with the car fully primed. I can always add the cover later.
Lots of grinding and sanding on the 100's of plug welds (over 500 just in the fenders and rockers). If I had realized how much finishing of the welds was required I'd found a way to get a good resistance spot welder. Little late now as I don't have that much left.
As mentioned before there was rust where the B-pillar meets the side/quarter light window frame. There was also a small dent in the outside of that frame. So I cut out the plate that was rusted to about half way up the frame. It became obvious why it rusted. Where the quarter light window rivets to the frame water had came in through those holes. With no opening at the bottom (thanks triumph) the dampness rusted a big hole. But it also rusted the inside pretty good and there were some pinholes near the bottom as well. Bummer.
I cut the same part from the parts car but was not optimistic that it would be a lot better. It was better but it also had some thinning metal at the bottom. I was considering using it when I noticed a crease on the window frame side from when the roof was crushed pushing it against the glass. From the disassembly I was able to see there is NO primer of paint in there. Remarkable that it wasn't worse after 50 years.
Back to my original piece i finished removing the backing plate. Quite a lot of rust but near the bottom was the only really bad stuff. Sorry no picture. Not sure where it went. Sand blasted the whole thing which showed some patching was required. Decided instead of cutting out chunks and welding in patches to put in a piece of backing material and weld through the thin spots to build them up. Figured it was faster and less likely to get everything out of sorts.
While the back was totally open I hammered out the small dent. Then noticed some other warping near the bottom on the quarter light side. Perhaps this contributed to the water getting in.
In making a new patch piece for the back I decided that instead of trying to form the crease down the center I would weld a stiffening rib on where would be the inside. This worked nicely even though the welding was a bit terrible. But it did warp the plate and I had to straighten it. After straightening I put it against the car only to see that on the side window edge the car isn't straight at all but curves as it goes down. With a little work I put that curve back in. Epoxy primed the inside the welded it on.
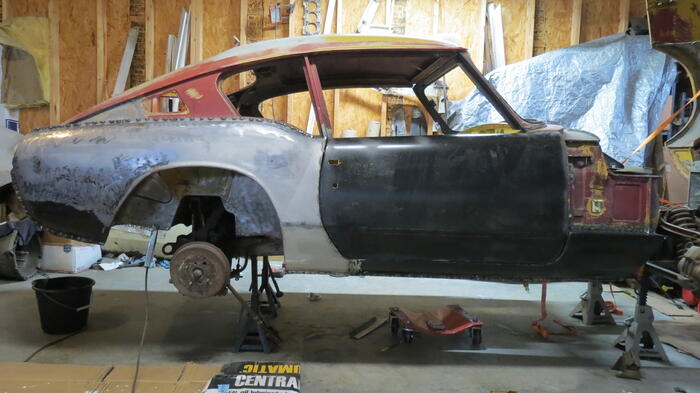
After about 50+ man hours of work and 3 weeks the car looks......Well about the same. But instead of screws holding it together it is welded solid. Starting to feel like a car again instead of an art project.
It feels a bit weird to have to ask myself "what do I work on next". Been on the same part of the car for sooo long.
Well the RH Rear fender and rocker are welded on to the car. Spent a few evenings doing one last hammer and dolly on the patches and punching the holes. Then welded it on. All except the end cap which I'm keeping open so I can paint and maybe even seam seal later.
Sadly the car looks about the same as it did when everything is screwed together. But it is much more solid now. I've had a strap holding the lower A pillar in position for so long (without the rocker the lower A pillar is mostly just one thickness of sheet metal). It was nice to finally remove it.
It all turned out pretty good except the vertical gap between the door and rocker panel. Despite it looking good when screwed together after welding I noticed it's not as consistent as it was. It's a bit tighter a little bast the middle of the door and then back to good. Humm. I'll try the shrinking disc on it later. Perhaps it can shrink the metal back so it is better. But that can be a future project.
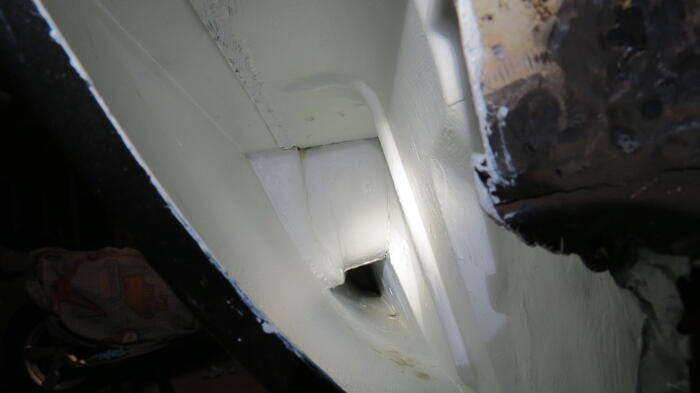
The one white tunnel picture is the inside of the rocker panel showing that the bottom edge has been painted (will do the top when I flip the body over). The brown spots are blasting media that must have slipped through the upper seem. Guessing from the inner sill to stiffener. That blasting media gets everywhere.