Friday, September 30, 2022

Running the motor again

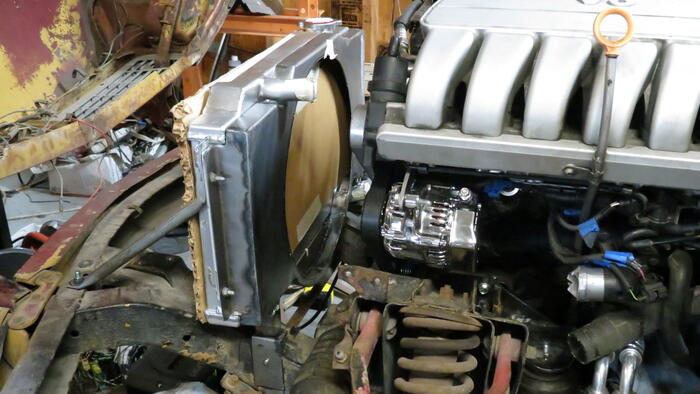
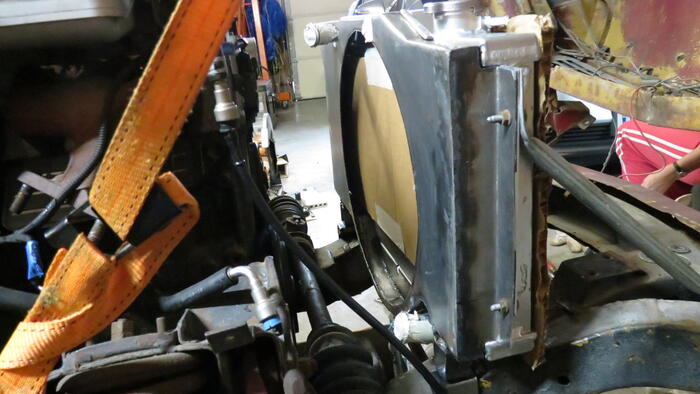
It won't Start! But before I get to that an update on progress. Cooling hoses are connected up enough for testing. Here is a pic I took when it was mostly done.

After the cooling lines were all connected I powered up the electrical system and put the key in and it won't engage the starter. Bad deal. The cluster now says the steering lock is defective and red steering wheel lights up on the dash. That s a new and bad error. We have stripped a ton of wires from the harness but I've checked and all the ones for the steering lock are intact and look good. Using VCDS it surprisingly shows the immobilizer is happy. The steering steering lock is in the unlocked position. The steering lock quit locking on earlier engine starts due to some of the modules I removed.

I'm a bit frustrated with it. Not sure if the steering lock module is now broken, something else is broken, some wire to something else is missing causing it to think it's broken or if the no start is something unrelated. It may be time to remove the IMMO but if the issue is something else that's be kind of a waste and might not fix it. Already spent many hours looking over wiring diagrams and checking things. Fixed a couple wires that were mistakenly removed but so far still no starter action.

I've taken the steering lock apart and checked it to see if it just failed but it appears good. I expect it is likely a wiring problem from us removing gobs of wires or man handling the wires but where? My guess at the moment is either the J393 module or J519 module. Checked over the J393 module connections last night and none of the removed wires appear significant. Did find out that unplugging the J393 module allowed things to power up (T15) and NO steering defective error on the dash (no errors in the text window and and just a few lights). Strange. Oh with J393 plugged in and the steering lock unplugged or the steering wheel module unplugged nothing powers up. Or if the Steering lock is in the locked position (and everything plugged in) nothing powers up (it currently set to the unlocked position.)

Things I changed before the steering lock error went off. I found a ground wire not grounded. However this wire was simply a diode to ground from one of the power leads in the fuse box. Grounding the wire didn't appear to change anything. Recoded the comfort module (J393) back to Auto trans along with the steering wheel electronics back to Auto trans. Then the steering lock error (red steering wheel) went off and the steering lock started actuating again. The engine allowed to start field in VCDS is now showing as Yes.


The cluster still says "depress clutch", odd as I can't find anything that is not coded to auto trans with the exception of the gateway, which I've unchecked the auto trans as that module isn't there. On J519 there is a wire that ran to the P/N switch and looks like may go to the clutch switch on manual trans cars. When grounding that wire (T16g/7) the J519 module sees the P/N switch as activated. With that wire grounded pressing the key all the way in now activates the starter relay. Now I just need a better battery and some fuel and it should run again!

Got a new battery and the car started then died. No new errors. Seemed a bit fuel starved. Ran the pump a bunch of times hoping to get the air out but the engine would fire up, fun a bit and die. The fuel lines were connected the exact same way as the first time. So seemed like it should work. Looking at the fuel pump assembly I noticed a large amount of fuel coming out the extra line, I thought it was just for the 4motion version. The tube I had that would attach there inside the 4motion tank was quite restrictive so I just plugged it (see picture) and the car started and ran just fine. Ran the engine for about 5 min. and shut it down. So success there. The wiring and modules seem happy again.

After looking up new fuel pumps seems the FWD (2wd) version also has this same tube out of the fuel pump? Weird. Will have to research that a bit more.


Below is a picture of the bin holding the wiring and a few electronics boxes we have extracted so far from the wire harness. And that's not even all of it.

Sunday, September 25, 2022

Possible Rear Disk Brake Conversion :-)

 This week we finished up the temporary hose routing then tried to start the engine. Sadly it was complaining of some error and wouldn't even engage the starter. Strange as we had this setup working before and only removed wires that weren't connected to anything. After much time reading diagrams and checking thing and changing some coding back to automatic transmission we were able to get the error to go away. Unfortunately the battery is dying so I need to replace that before going farther.


Also on Saturday we brought in the floor from one of the scrapped GT6's. I kept it for the purpose of testing new suspension fitting. It's very liberating to be able to cut without worry that it's not the "right" place. And after I cut and fit it, sure enough, I could see a better spot to cut. So nice to have a practice run.


Overall it's not looking bad. Looks like I need to enlarge the suspension/axle tunnel 3-4" forward. I'll try to move the rear suspension cross brace forward a couple inches to avoid cutting the rear of the suspension tunnel on the actual car. Would like to get my differential to see how it fits in first (Waiting on the salvage yard). Then there is the integrating this part into the Triumph frame. Always more to do.


Sunday, September 18, 2022

Radiator Hoses - Possible New Rear Suspension?

One night I decided to modify some suspension parts I bought for the project quite a long time ago. Was kind of a whim thing to work on this now and especially with so little planning but it looks like it might have turned out. Narrowed it 8 7/8 inches. Time will tell if this is a good amount or not. It's just tacked together so it is easy enough to change.


 This week was spent fitting radiator hoses. Bought a bunch of 90 degree elbows, misc hoses and an aluminum tube. Starting to fit it all to the motor. Used the simple wire crimper method to bead the end of the tube. No pictures but there's plenty on the web. Right now I'm skipping connecting up the heater and some of that misc. I can do that later. Waiting on some caps to cap off the unused ports.


Sunday, September 11, 2022

Mounting The Radiator

 Now that we have a fan shroud and radiator it's time to put them in the car. The GT6 and spitfire use different mounting points on the frame.

Since my frame is a GT6 the spitfire mounts aren't there. Also the spitfire puts the radiator into a bracket then mounts it to the frame. Which I also don't have. So decided to make my own mounts.

Wasn't much of a chore to make them. Now the radiator is mounted and I can move on to fitting cooling hoses to the engine.


Monday, September 5, 2022

Fan Shroud


 Last 2 weekends I worked on creating a fan shroud. Plan is to use the Passat OEM fan so it'll play nice with the ECU. Wanted to use the Passat radiator too but it was too large to fit under the hood. Looked at using the GT6 radiator but with the engine so far back the Gap between the radiator and the engine looked ridiculous. Decided to buy a cheap Spitfire radiator as it sits farther back. Yah it's from a 4 cyl but the radiator area looked about the same. The GT6 is more vertical where the Spitfire is more horizontal. If it's a problem we'll probably go with a custom radiator However most hotrods, including my last engine swap, seem to have problems cooling in traffic not doing high HP runs.. which tends to be due to not enough air flow over the radiator and not the radiator size. So this car will be getting a fan shroud which should greatly improve the low speed cooling. Anyway back to the fabrication.


Fan shroud version 1 I created out of some aluminum sheet laying around. Thought it'd make a nice shroud to go with the aluminum radiator. And not having to paint it was a plus. It was going ok but it was starting to crack from some of the bending and joining the bent over flanges was looking like a drag. The metal was probably a bit too thick for what I was doing with it.


Fan shroud version 2 I made out of some 18 ga metal I had left. Working with the sheet steel was fun. It was easier to bend and I could easily weld bits together. Anyway it is pretty much complete except for paint.


Beading Floors And Misc

This past  week time was spent trying out a newly purchased beading tool. Being able to bead looked like fun and with so much of the rear fl...